The Outline Note-Taking Method: Steps, Benefits, and When To Use
If your pages are crammed with arrows, doodles, and disconnected bullets, it’s hard to study fast or present ideas clearly. Outlines improve clarity and efficiency during study and review. This guide answers the question many learners type into search bars What is the outline method, and shows how to turn raw information into a clean hierarchy you can skim in seconds. You’ll learn how to set up outline notes, apply the structure live in class or meetings, and polish them for review. We’ll also cover when the technique shines, when it struggles, and give you a copy-and-paste example you can adapt for any subject.
What is the Outline Method?
The outline note taking method is a structured way to capture ideas using clear levels: main points on the left, supporting points indented beneath them, and fine details indented further. Each indentation level signals importance and logic is like a skeleton that keeps related concepts together. This arrangement makes relationships explicit and reduces duplication
In practice, outline note taking works by assigning every idea a place in a hierarchy:
- Level 1 (I, II, III): central topics or headings
- Level 2 (A, B, C): key subpoints
- Level 3 (1, 2, 3): evidence, definitions, or steps
- Level 4 (a, b, c): examples, edge cases, or references
Keeping the same sequence (I, A, 1, a) across the page prevents level drift. This format reduces cognitive load, prevents duplication, and makes it easy to scan later. It also improves organization by keeping related ideas in predictable positions, because the structure is consistent, you can add, collapse, or expand sections without rewriting the whole page. There are small variations across outline methods: some use Roman numerals, others dashes or bullets — but the principle is the same: top-level ideas first, then nested details.
How to Use the Outline Method
If you’ve wondered how to take outline notes, use this three-phase workflow: prepare, capture, and polish.
1) Prepare (before the lecture or meeting)
- Select the template. E.g like College ruled 7.1 mm.
- Skim the agenda, syllabus, or table of contents to predict top-level headings.
- Reserve space for each major section. Leave 3–4 blank lines under every Level-1 heading for later additions.
- Decide your outline format for notes and stick to it (e.g., I, A, 1, a). Consistency beats decoration.
- Create a tiny legend for signals: ★ = high-yield fact, ? = clarify later, ! = exam-relevant.
2) Capture (live)
- Write one idea per line and place it at the lowest level that fits the logic.
- Keep wording concise: nouns + active verbs (e.g., “Enzymes lower activation energy”).
- When the speaker changes topic, start a new Level-1 line; when they explain or give evidence, move to Level-2/3.
- If you miss something, mark a placeholder (?) and keep moving — don’t break the flow.
- Use parallel phrasing at the same level to improve recall during review.
3) Polish (after)
- Re-read once and promote/demote lines if needed (surface buried insights to Level-2).
- Add cross-links (“see II.B.3”) and brief definitions next to new terms.
- Turn Level-2/3 lines into study questions or flashcards (prompt on the left, answer on the right).
- Add a 2–3-line summary at the top: purpose, key mechanism, implications as a quick summarization step
Quick starter template (copy/paste)
- I. Topic
- A. Subtopic
- 1. Key detail
- a. Example
- 1. Key detail
- A. Subtopic
- II. Next topic
- A. Subtopic — repeat the pattern
This simple setup keeps your hierarchy visible, speeds up review, and makes it easy to extend notes over time without losing structure.
Why the Outline Method Works
The outline approach reduces cognitive load by converting a stream of information into a small set of repeating decisions: identify the main idea, place it at the first level, and nest related details beneath it. This predictable pattern frees attention for listening and reasoning rather than formatting. Over time, your brain learns the hierarchy and retrieves it faster because the structure itself becomes a memory cue.
Outlines support “chunking.” Grouping details under a parent idea turns five or six facts into one meaningful unit, which is easier to remember and review, improving comprehension. During study, the first level gives a fast overview, while the lower levels let you drill down only where needed. That balance of scan-then-zoom helps with both initial learning and exam revision.
Another reason **outline notes** are effective is that they separate signal from noise. When you assign each line to a level, you must decide what is a claim, what is evidence, and what is an example. That decision-making deepens understanding and exposes gaps you can fix later. Finally, outlines are flexible: you can insert new subpoints without breaking the page, merge two branches when topics overlap, or promote a buried insight to a higher level after class. The structure is durable even when you revisit the topic weeks later.
When to Use the Outline Method
Use outlines when the content follows a clear logic or agenda and you need fast review later. Typical cases include:
- Lectures or talks with explicit sections (introduction, concepts, examples, implications).
- Textbook chapters and technical articles with headings and subheadings.
- Meetings with a structured agenda and decisions to capture (topic → options → rationale → action).
- Exam preparation where a high-level map plus key proofs or mechanisms matters more than verbatim detail.
- Research synthesis: grouping findings into categories, methods, and limitations under each theme.
- Writing prep: outlining arguments before drafting paragraphs on standard Lined Paper 7mm.
Outlines are less ideal when information is non-linear or highly visual. Examples: free-form brainstorming, spatial diagrams, complex mathematical derivations, circuit analysis, and design sketching. In those cases, pair the outline with a complementary technique (mind map, Cornell cues, sketch notes) and switch back to a hierarchical structure once patterns emerge.
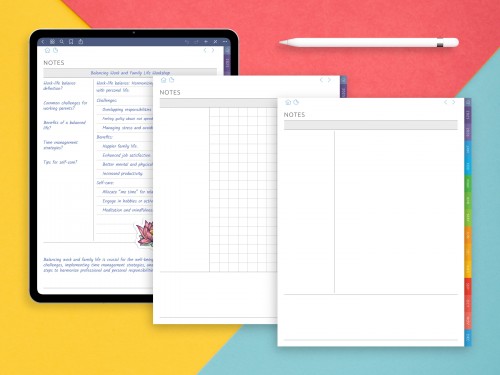
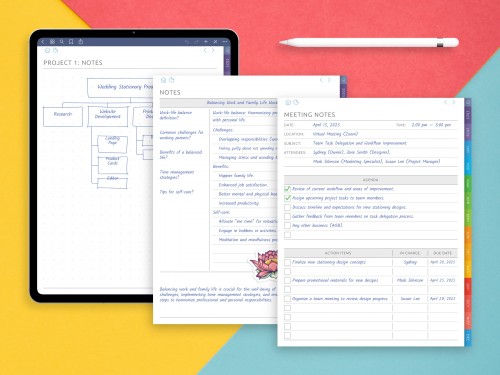
Example of Outline Notes (Visual)
Below is an example of outline notes you can copy and adapt. It shows the hierarchy (I, A, 1, a) and how claims, evidence, and examples stack neatly. Add symbols like ★ for high-yield lines and ? where you need to clarify later. This makes your outline notes quicker to scan during review.
- I. Photosynthesis — overview
- A. Definition
- 1. Converts light to chemical energy
- a. Occurs in chloroplasts (plants, algae)
- 2. Supplies carbohydrates and oxygen
- 1. Converts light to chemical energy
- B. Key stages
- 1. Light-dependent reactions
- a. Location: thylakoid membranes
- b. Outputs: ATP, NADPH, O₂
- 2. Calvin cycle
- a. Location: stroma
- b. Fixes CO₂ → glucose using ATP/NADPH
- 1. Light-dependent reactions
- C. Factors affecting rate
- 1. Light intensity
- 2. CO₂ concentration
- 3. Temperature
- A. Definition
How to read it: first skim Level I and A to recall the big picture, then glance at 1 and a only where you feel rusty. If you prefer other subjects, just keep the same hierarchy and replace the content. This keeps your outline consistent across classes and makes spaced review faster.
Tips for Better Outline Notes
Use these practical guidelines to make your outlines clearer, faster to write, and easier to review.
- Listen for structure first. Capture the argument’s skeleton (topics and subtopics) before filling in details.
- One idea per line. Short, declarative phrases beat long sentences during live note taking.
- Keep levels visually distinct. Consistent indentation and markers (I, A, 1, a) prevent level drift.
- Parallel phrasing. Use similar grammar for sibling items to improve recall and scanning.
- Flag importance. Add simple symbols: ★ for high-yield, ! for exam focus, ? to clarify later.
- Timebox polishing. Spend 5–10 minutes after class to promote/demote points and add cross-links.
- Turn details into questions. Convert Level-2/3 lines into prompts for active recall.
- Integrate sources. Note page numbers, slide IDs, or timestamps beside supporting points.
- Batch vocabulary. Collect new terms at the end of each section with one-line definitions.
- Mix strategically. For non-linear topics, sketch a quick map, then translate patterns into a clean outline.
- Prioritization first. Decide main ideas before the details to keep depth under control.
Pros and Cons
The outline approach shines when you need a fast, logical map of complex material and a reliable way to drill down only where it matters. Still, it is not a silver bullet. Use the trade-offs below to decide when to lean on outlines and when to pair them with another technique.
- Pros: Rapid overview from Level-1 headings; flexible expansion without rewrites; strong support for chunking and spaced review; easy conversion into study questions; clean handoff from lecture notes to draft outlines for writing.
- Cons: Less natural for visual or highly spatial content; quality depends on your ability to detect structure in real time; risk of over-condensing and losing nuance; can hide connections across branches unless you add cross-references.
Common Mistakes & Fixes
- Mistake: Everything lands at Level 1. Fix: Ask “Is this a claim, evidence, or example?” Demote evidence/examples to Levels 2–4.
- Mistake: Inconsistent indentation or markers. Fix: Choose one scheme (I, A, 1, a) and keep it on a sticky note at the top.
- Mistake: Writing full sentences verbatim. Fix: Use terse, active phrases; capture only the information that answers “so what?”.
- Mistake: No space for additions. Fix: Leave blank lines after main points and add a margin column for later clarifications.
- Mistake: Missing links across sections. Fix: Add tiny cross-references (e.g., “→ see III.C.2”) when concepts connect.
- Mistake: Skipping the post-class polish. Fix: Spend five minutes promoting/demoting lines and writing a micro-summary.
The outline method turns messy input into a clear hierarchy you can skim, expand, and review quickly. Start by mapping top-level ideas, nest details beneath them, and reserve a few minutes to polish. Select the template, e.g, Narrow Ruled 1/4 inch, print it out. Use symbols to flag importance, convert subpoints into questions for practice, and pair the outline with quick sketches when topics are visual. With steady use, your structure becomes a memory cue, and studying gets faster and more reliable.